
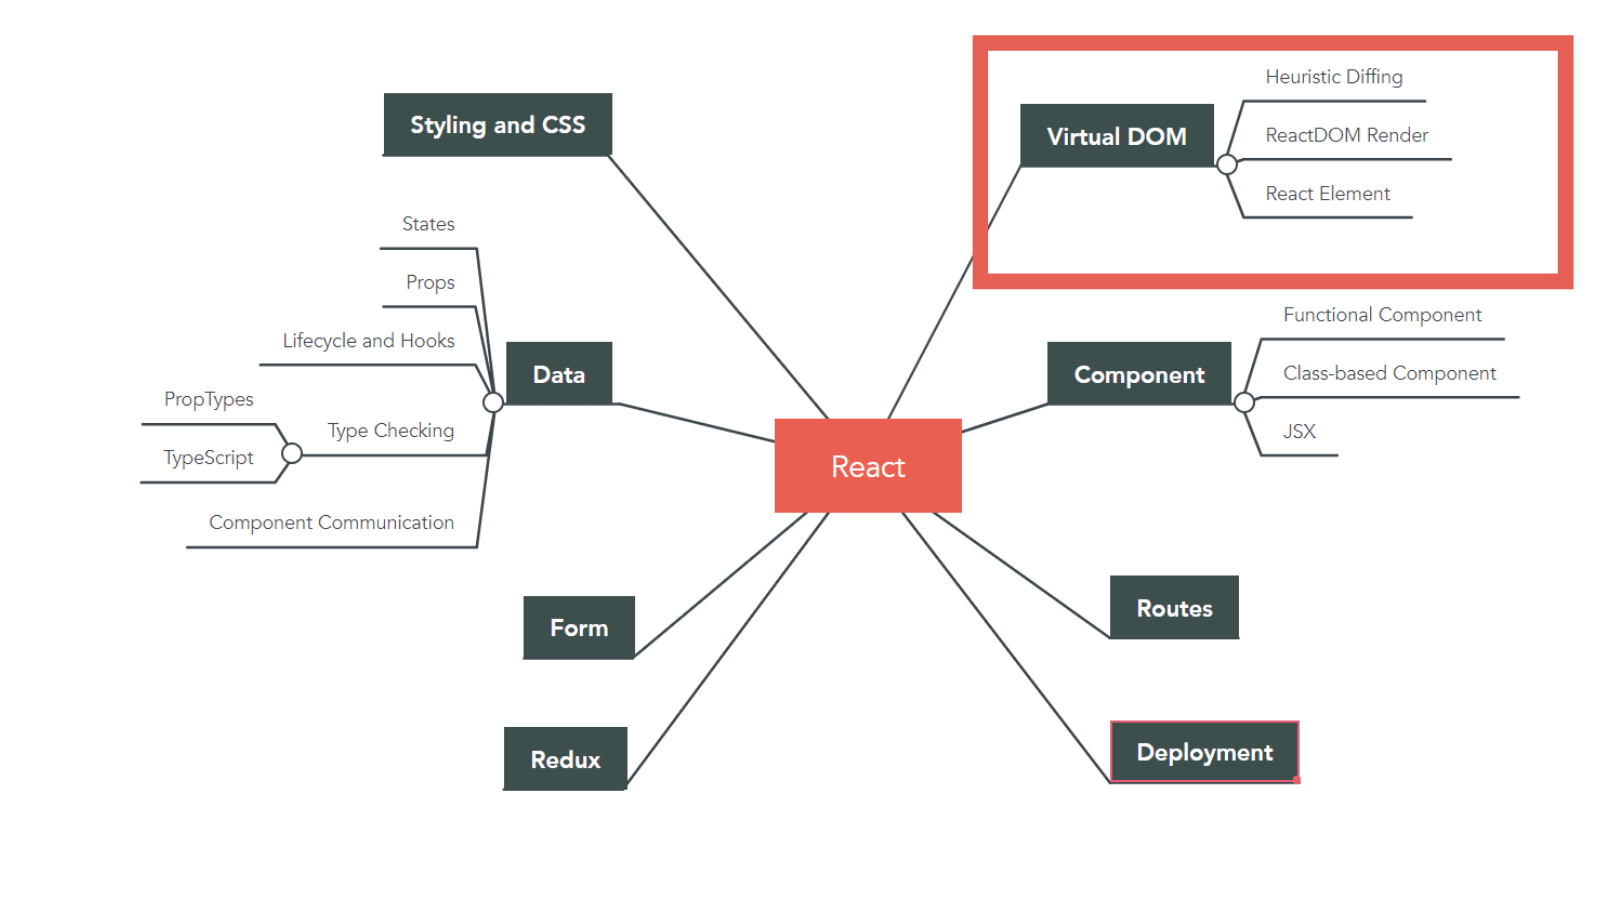
React - Meet Virtual DOM
We briefly discussed the features of React in the introductory post of this series. In this article, we will dive deeper into the declarative programming aspect of React by exploring React's virtual DOM.
A major theme in React is a drive to simplify otherwise complex tasks and abstract unnecessary complexity away from the developer. React tries to do just enough to be performant while freeing you up to think about other aspects of your application. One of the main ways it does that is by promoting declarative instead of imperative programming. You get to declare how your components should behave and look under different states, and React's internal machinery handles the complexity of managing updates, updating the UI to reflect changes, etc. One of the major pieces of technology driving this is the virtual DOM.
A virtual DOM is a data structure that mimics the Document Object Model (DOM) in the browsers. React is not the only framework using a virtual DOM. Other frameworks such as Ember employ their own implementation of a virtual DOM. A virtual DOM serves as an intermediate layer between the application code and the browser DOM. The virtual DOM allows the complexity of change detection and management to be hidden from the developer and moved to a specialized layer of abstraction. React's virtual DOM handles change detection in data as well as translating browser events into events that React components can understand and react to.
The DOM
To understand virtual DOM, we first need to understand the DOM. If you're already familiar with the DOM, feel free to jump ahead to the next section.
The Document Object Model (DOM) is a programming interface that allows JavaScript programs to interact with different types of documents (HTML, XML, SVG, etc.). There are standards-driven specifications - a standard set of features created by the public working group - for the DOM.
The DOM provides a structured way of accessing, storing, and manipulating different parts of a document. At a high level, the DOM is a tree structure that reflects the hierarchy of an XML document. This tree structure is comprised of sub-trees that are in turn made of nodes as shown in the image below. The DOM API that is exposed to JavaScript allows access and operations on each of these elements in the tree.

Whenever you use a method in JavaScript that accesses, modifies, or stores information related to something in an HTML document, you're using the DOM or its related API. Not all methods used in JavaScript are part of the JS language itself. In fact, they are part of a bigger collection of web APIs. For example, some common methods or properties that may be used to update or query a web page are: getElementById, parent.appendChild, querySelectorAll, innerHTML. These methods are provided by the host environment - the browser - and allow JS to interact with the DOM.
In the context of a large web application, interacting with the DOM in this manner could get quite complicated. That's when virtual DOM shines.😎
Virtual DOM
As mentioned in the previous section, there are certain pain points when it comes to working directly with the DOM via the regular web APIs, especially when building large and complicated web applications. Generally, these pain points arise in the area of change detection.
Particularly, when data changes, we need to update the UI to reflect that. However, doing that in a way that is efficient and easy to think about can be difficult due to the way browsers handle interactions with the DOM. When a DOM element is accessed, modified, or created, the browser is often performing a query across a structured tree to find a given element. It will then need to adjust the layout, sizing, and other actions as part of a mutation, all of which can be computationally expensive.
A virtual DOM can help with optimizing DOM updates to account for these constraints. And that's exactly what React's virtual DOM aimed to solve, i.e. implementing a virtual DOM that is fast enough while maintaining a robust API, simple mental model, and cross-browser compatibility. The keyword here is "fast enough" because there is another factor that influences the design in React, which is simplicity. In other words, it must be simple enough to allow developers to defer extensive thinking about how the virtual DOM is accomplishing complicated state update logic and focus on the more important aspects of building their applications. Therefore, when building applications with React, we don't often need to directly interact with the DOM. Instead, we mostly leave that to React. But, how does the virtual DOM work?
DOM mutation done poorly can be computationally expensive, so React tries to be efficient in its update to the UI by implementing a diffing and update procedure.
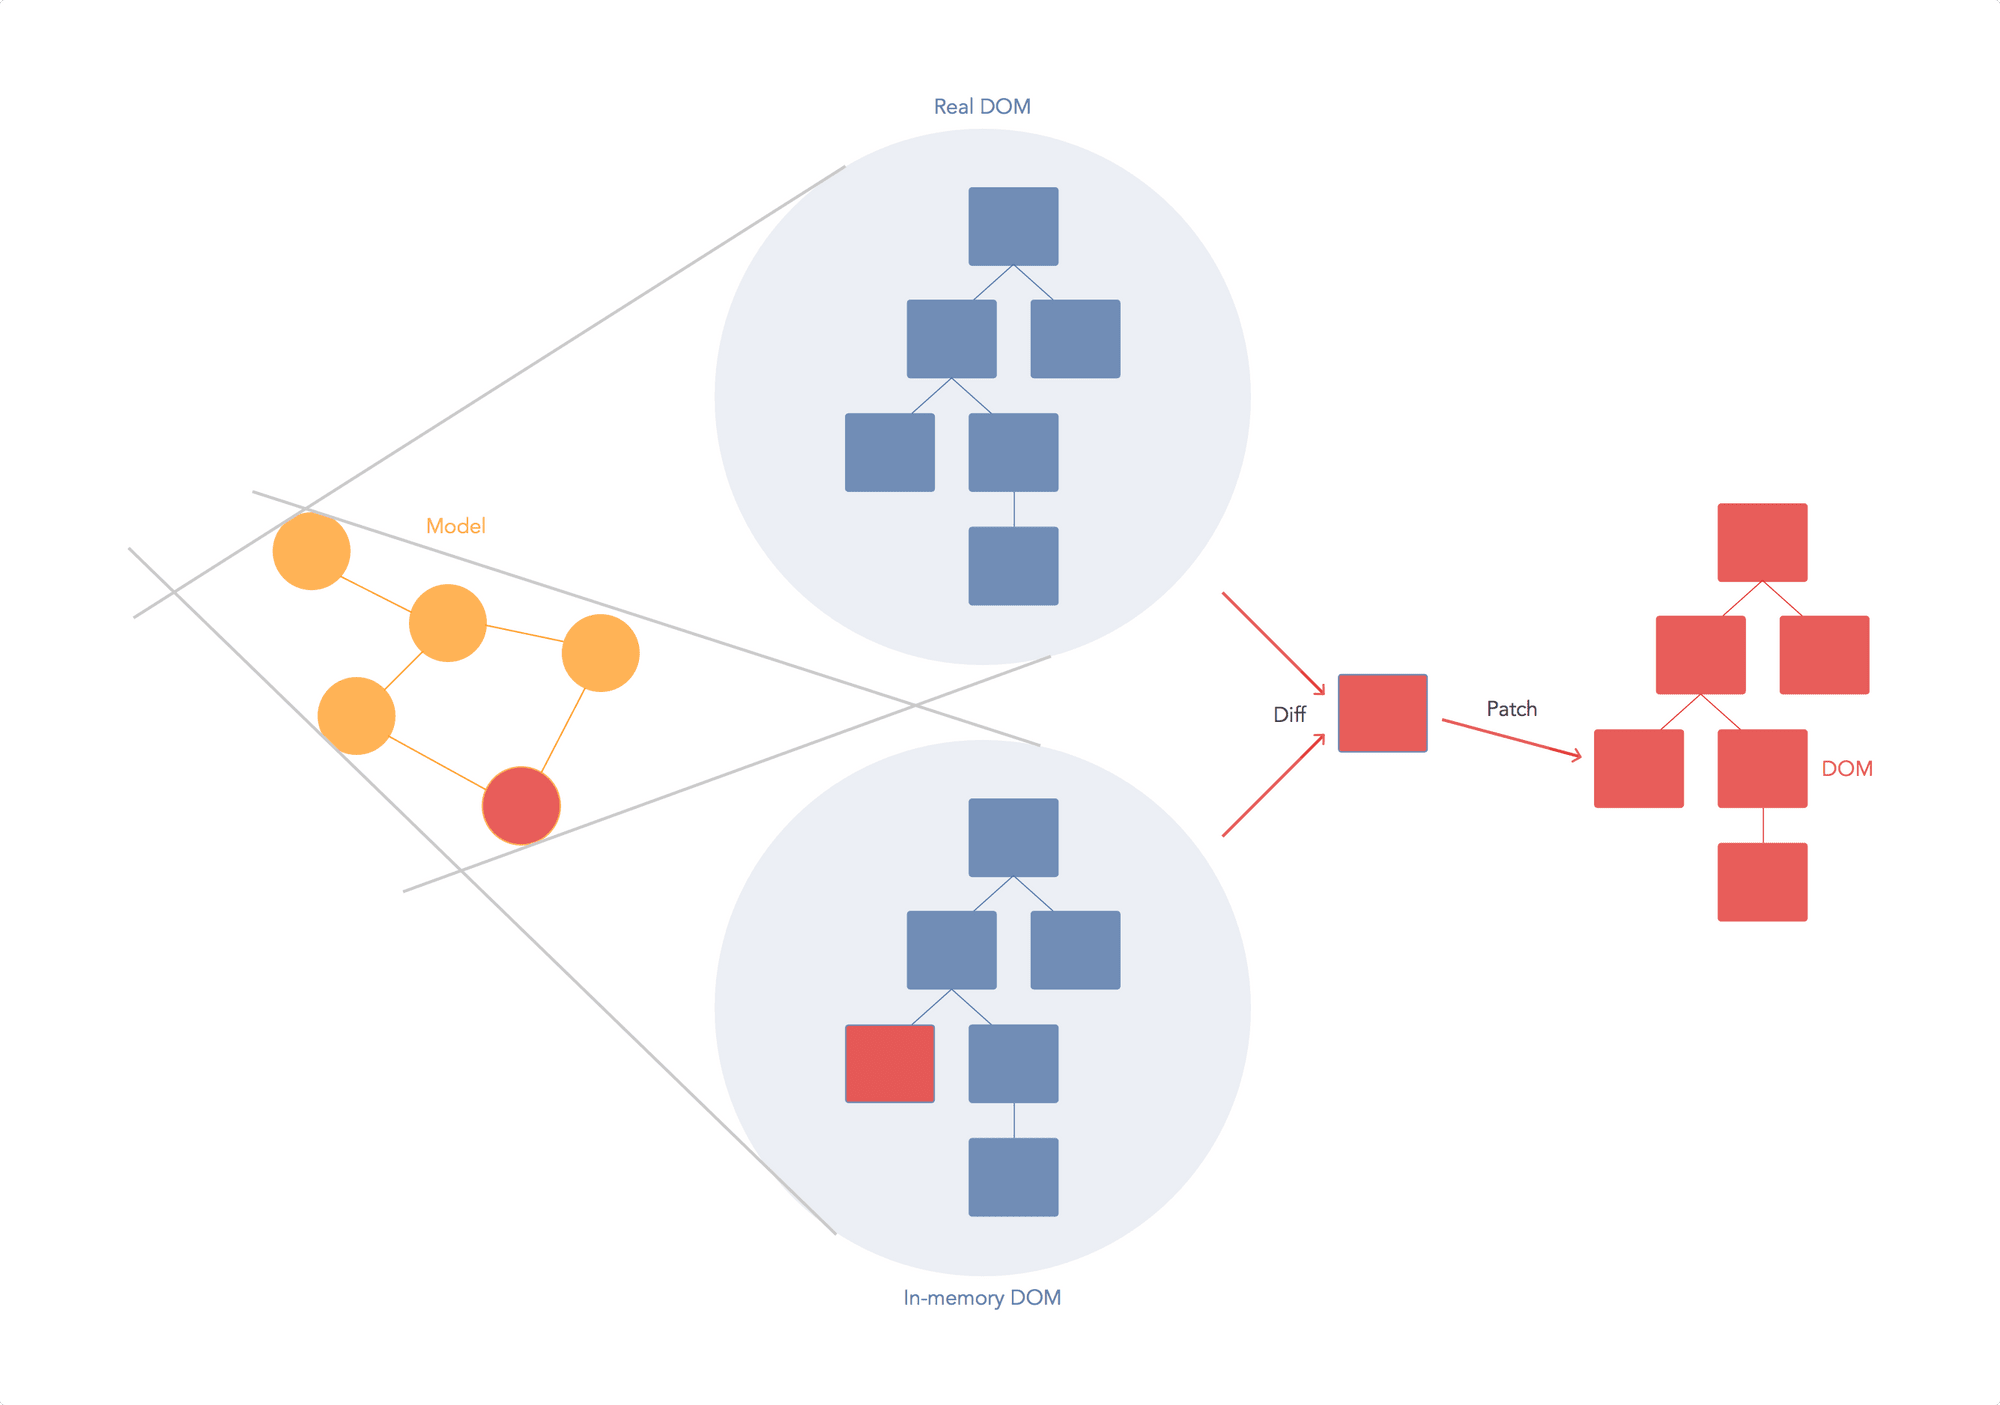
React creates and maintains a virtual DOM in memory, and a renderer like react-dom handles updating the browser DOM based on changes. React solves the performance issue by implementing heuristic diffing - a method to calculate which parts of the in-memory DOM require changes to the DOM and perform intelligent updates only on the parts that have changed as shown in the image below.
To see the heuristic diffing mechanism in action, let's look at a simple example using both the native Web API and the React API for comparison purposes. To keep things simple, we will not be using components or JSX (the JavaScript extension that is used with React). Through this example, we will also learn about two core API methods: ReactDOM.render and React.createElement. These methods lay the foundation for our next article in which we get to learn about React components.
Heuristic Diffing
Before we can use the React library, we need to somehow import it into our application code. We can do that using one of the following methods as suggested on the React documentation. Once imported, the React's top-level APIs are available on the React global variable.
- Load React from a
<script>tag. The CDN links for both the React and ReactDOM libraries can be found on the React website. - Use
import React from 'react'if using ES6 with npm. - Use
var React = require('react')if using ES5 with npm.
To start off, let's render a simple HTML element to the display using two different methods: one from the native Web API, and the other from the React API as shown below.
You should see a "Hello Native Web API" box and a "Hello React" box. Let's study the code.👩💻
Basically, we have two nodes: mountNode1 is controlled with the DOM API directly while mountNode2 is controlled with the React API, which in turn uses the DOM API. The only major difference in how these two nodes were built is that in the DOM API version we used a string to represent the DOM tree, while in the React API version we used pure JavaScript calls and represented the DOM tree with an object instead of a string.
document.getElementById('mountNode').innerHTML = `
	<div>
    Hello Native Web API
  </div>
`;
ReactDOM.render(
  React.createElement(
    'div',
    null,
    'Hello React',
  ),
  document.getElementById('mountNode2'),
);
Let's focus on the React API. The ReactDOM.render and React.createElement methods are the core API methods in a React application. In fact, a React web application cannot exist without using both of these methods.
ReactDOM Render
This is basically the entry point for a React application into the browser's DOM.
ReactDOM.render(element, container[, callback])
It takes two required inputs and one optional input:
element: The first input is a React element, which we will explore in the next section. Basically, this input dictates WHAT to render to the browser.container: A React element must be rendered inside a container, which is a valid DOM node that exists in the statically rendered HTML. In our example, it's the<div>element with theid=mountNode2specified in theindex.htmlfile. Basically, the container dictates WHERE to render the React element in the browser.[callback]: If provided, the callback will be executed after the component is rendered or updated.
React Element
We mentioned React element in the previous section. What exactly is a React element anyway? Well, long answer short, it's a virtual element describing a DOM element. The React.createElement API method returns a React element.
Instead of working with strings to represent DOM elements (as you've seen in the native Web API example above), DOM elements are represented as objects created by calling to the React.createElement method. These objects are known as React elements.
React.createElement(
  type,
  [props],
  [...children]
)
The above method has three arguments and returns a new React element of the given type:
type: Thetypeargument can be either a tag name string (such as'div'or'span'), a React component type (a class or a function), or a React fragment type. In this example, we're passing'div'as the type. We'll be covering React components and fragments in a future post.[props]: Any attributes (id,href,title, etc.) we want the DOM elements to have. In this example, thedivelement we're using has no attributes, so we passed innull.[...children]: This argument forms the children list for the rendered element and is the content of the DOM element. An element can have zero or more children.
No matter how complicated the UI is going to get, when using React every HTML element will be represented with a React element. React elements are created in memory. To actually make a React element show up in the DOM, we need to use the ReactDOM.render method which will figure out the most optimal way to reflect the state of a React element into the actual DOM tree in the browser.
To demonstrate how React elements can be nested, let's add a couple more elements to the current UI. Let's add a textbox to read input from the user and the current time displayed inside a <pre> tag. We'll do that to both the native Web API and React API versions. As shown below, both the <input> and <pre> tags were added by making a nested React.createElement method call inside of the top-level React element. Both versions should still be rendering the same exact HTML in the browser.
At this point, you're probably thinking that using React is a lot harder than the simple and familiar native way. What is it that React does so well that makes it worth giving up the familiar HTML and having to learn a new API to create what can be simply created using the native Web APIs? The answer is not about the initial rendering of the HTML view. Rather, it's all about updating the existing view in the DOM. And that's when the heuristic diffing mechanism comes in handy.
Heuristic Diffing
To demo this concept, let's add an update operation to the DOM trees which can be done using the setInterval method from the Web timer API. But first, we'll need to put all of our DOM manipulations for both versions into a function, which we'll name as render, and pass it into the setInterval method as a callback in order to call it every second.
const render = () => {
  document.getElementById('mountNode').innerHTML = `
    <div>
      Hello HTML
      <input />
      <pre>${new Date().toLocaleTimeString()}</pre>
    </div>
  `;

  ReactDOM.render(
    React.createElement(
      'div',
      null,
      'Hello React',
      React.createElement('input', null),
      React.createElement('pre', null, new Date().toLocaleTimeString())
    ),
    document.getElementById('mountNode2')
  );
};

setInterval(render, 1000);
Are you ready for what you're about to see next?😜 This is when React is going to blow your mind.💥 Now, try typing something into the textbox of the native Web API version. You won't be able to.😜 This is very much expected because we are basically throwing away the whole DOM node on every tick and regenerating it. However, try typing something in the textbox that is rendered with React. Magic!!!✨😎 So what's the difference?🤔
Although the whole React rendering code is wrapped inside the ticking timer, React is only changing the content of the <pre> element and not the whole DOM tree. In other words, the textbox was not regenerated, which is why you were able to type in it.
You can see the difference in how the native Web API and the React API update the DOM visually by inspecting the two DOM nodes in the Chrome DevTools. As shown below, the native Web API regenerates the entire <div id="mountNode1"> container with every tick, while React smartly regenerates only the <pre> tag in its <div id="mountNode2"> container.

This is React's smart diffing algorithm in action. It only updates in the main DOM tree what actually needs to be updated while keeping everything else the same. This diffing process is possible because of React's virtual DOM representation that it keeps around in memory. No matter how many times the UI views need to be regenerated, React will take to the browser only the needed partial updates.
Not only is this method a lot more efficient but it also removes a big layer of complexity in the way think about updating UIs. Having React do all the computations about whether we should or should not update the DOM enabled developers to focus on thinking about their data (state) and the way to describe a UI for it. Developers can focus on updates on the data state as needed without worrying about the steps needed to reflect these updates in the actual UI in the browser because React's got their backs.😉